Scanning film negatives with a digital camera
Scanning film negatives with a flatbed scanner is a pain. All scanning software sucks. Every one of them. Fidgeting with negative holders is a joyless, tedious drag. And the whole process is slow. So very slow.
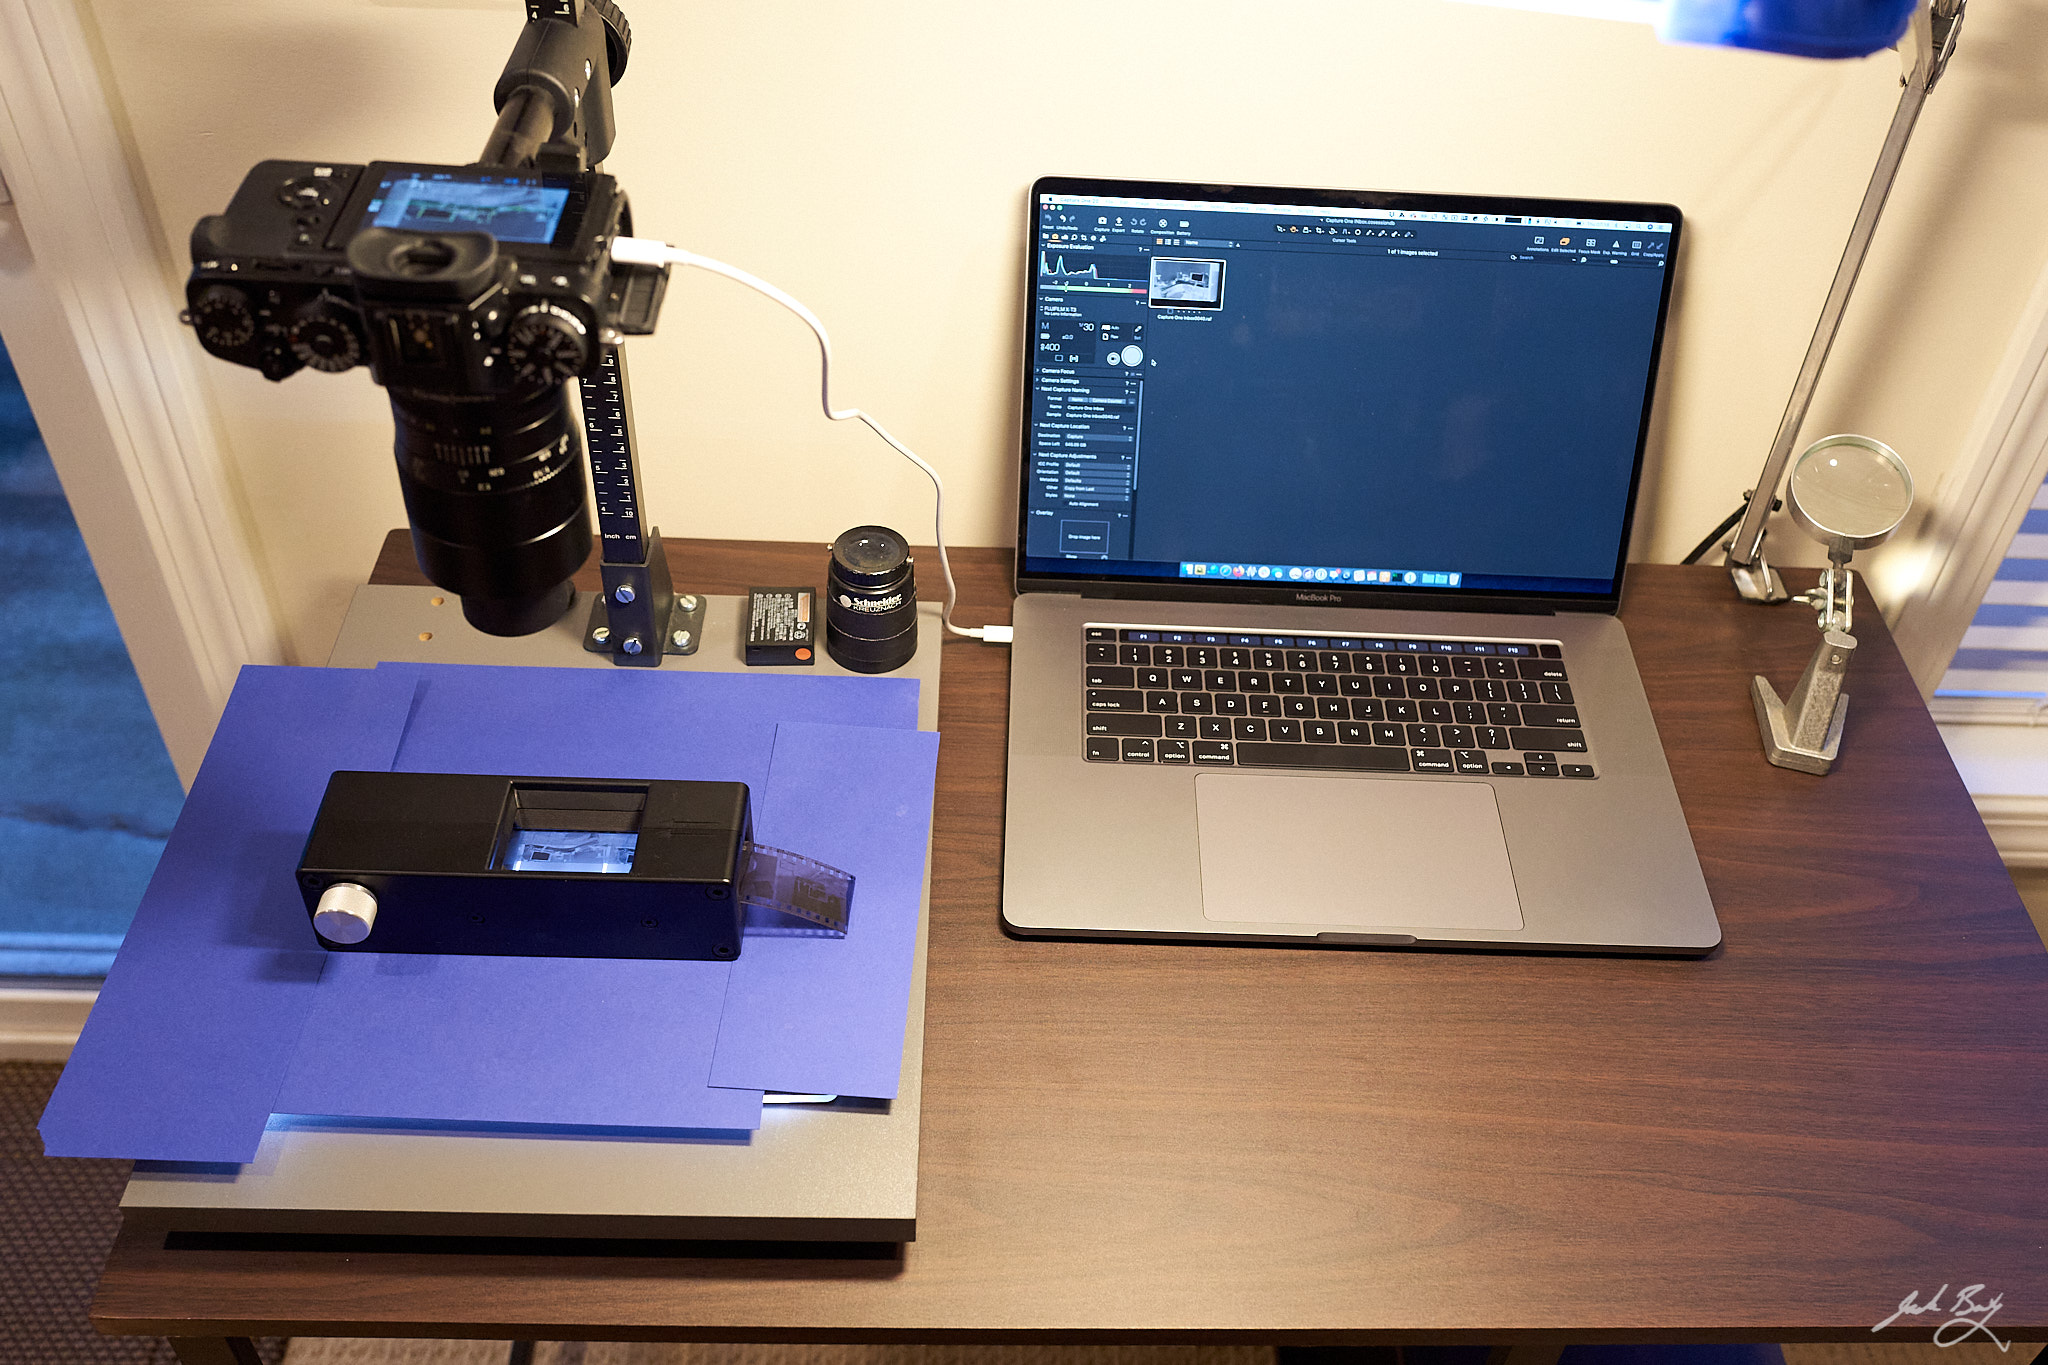
I’ve been experimenting with scanning film using a digital camera. I’ve processed a few rolls this way and it’s working quite well. Here’s my setup: a combination of the MK1 Film Carrier and Negative Lab Pro.
The MK1 Film Carrier from Negative Supply makes quick work of scanning a full, uncut roll of 35mm film. I feed the roll into one end and turn the knob to reveal each frame in turn. The film is held nice and flat and it operates smoothly. I was part of the Kickstarter campaign so I didn’t pay the full price of $329, which is good because although the device is nicely designed and made from machined aluminum, that’s a lot of money for what it does.

Negative Lab Pro is a plugin for Lightroom Classic that handles conversion of the original Raw “scans”. It’s really meant for color film scans, but I also use it for black and white. I originally used it for processing color negative film scans from the Epson scanner and it did such a great job with those that it became an integral part of my workflow. It even adds a metadata section to Lightroom for adding Exif data like camera make, model, lens, film stock, etc to each frame. This is very handy and replaces my command line version which I frequently forgot to run anyway. I don’t use Lightroom for my normal Raw processing, but I keep it around just for NLP.

The other components of this new scanning workflow are a small lightbox, a Fuji X-T3 with the 7Artisans 60mm Macro lens, a copy stand, and Capture One Pro.
The 7Artisans lens was a cheap Macro option for the Fuji and it works fine. Capture One Pro does a great job at tethered capture so I can make sure focus and framing are spot on for each frame as I work through the roll.
This method of scanning a roll of 35mm film is fast! I used to have a Pakon scanner that was even faster and easier at the actual scanning process, but was expensive, unsupported, cumbersome to get working, and required that I maintain an old Windows XP laptop.
My new digital film scanning process looks like this:
- Feed the film into the MK1 and check focus
- Use Capture One Pro on the tethered MacBook Pro to capture a frame
- Advance the film to the next frame and repeat
- Import the “scans” into Lightroom
- Crop and rotate the first scan, then copy and paste those adjustments to all remaining frames
- Select all scans and open Negative Lab Pro
- Convert and save TIFF copies
This entire process takes maybe 15 minutes and the results look good to me.